When I first started my sticker supply business five years ago, I made a ton of mistakes. I burned through $2,000 on a beginner inkjet printer that smudged, faded after two weeks in a customer’s laptop case, and required me to hand-cut every single order—something that took 10 hours a week just for small bulk runs. A fellow small business owner finally told me to stop fighting and invest in a sublimation printer for stickers, and that one choice completely changed how I operate today. If you’re tired of flimsy stickers that don’t hold up, or spending all your free time cutting, I’m walking you through exactly how I make high-quality, durable sublimation stickers from start to finish—no fancy lab equipment, just practical stuff I’ve learned shipping over 50,000 stickers to cafes, small retailers, and Etsy sellers across the country. Stickers

First, let’s get one thing straight: sublimation stickers aren’t the same as the ones you print on regular sticker paper and stick to an adhesive-backed sheet. The difference is in how the ink binds to the material, and that’s why mine don’t peel in the rain, don’t fade when left in sunlight, and feel like a permanent part of the surface they’re on (for the right materials, of course). Before you dive into supplies, you need to lock in the basics, and I’m going to skip the overpriced “professional” tools that don’t make a difference.
Gather Your Supplies (No Overbuying, I Promise)
When I started, I ordered every fancy gadget on a supply forum and wasted $800 on stuff I never used. Here’s the only stuff you actually need, tailored for sticker production:
- The Sublimation Printer: If you’re a small business or just starting out, don’t splurge on a top-of-the-line $3,000 industrial model. I use a Epson EcoTank ET-2800 (refurbished, so it cost me $150) with a sublimation ink conversion kit from a reputable brand like SubliGrade. This works because it has a wide format and can handle thin paper, which is key for sticker work. For those doing larger bulk runs, a Epson WorkForce WF-7710 is a step up—slightly more expensive, but it prints 13×19 inch sheets, which means fewer cuts and faster production. I’d avoid all-in-one printers with tiny ink tanks or clog-prone models; you’ll just end up frustrated.
- Sublimation Sticker Blanks: This is the most critical supply, and I used to make the mistake of buying cheap blanks that wouldn’t hold ink. There are two types that work best: polyester-coated vinyl and polyester-coated paper. For durable stickers that work on water bottles, laptop lids, or toolboxes, go with polyester-coated vinyl—this is what I use for 90% of my wholesale orders because it’s waterproof and scratch-resistant. For indoor stickers (like those for coffee shop takeout cups or notebook stickers), polyester-coated paper works fine, but it’s not meant for wet surfaces. A note here: never use regular adhesive sticker paper, or paper that isn’t coated for sublimation. The ink will sit on top instead of binding, and your stickers will smudge and peel within days.
- Sublimation Paper: You can’t use regular copy paper here. The paper is coated to absorb sublimation ink in a way that only transfers when heat is applied. I use 8.5×11 inch or 11×17 inch sublimation paper from Hammermill—it’s affordable, doesn’t wrinkle in the printer, and has consistent ink transfer. Avoid the cheap no-name paper from eBay; I tested one batch once and it left streaks on every single sheet, wasting an entire order.
- Heat Press or Convection Oven: A small heat press works best for precision, especially if you’re doing custom die-cut stickers. I use a 12×10 inch Cricut EasyPress 2—it’s portable, doesn’t take up much space in my home workshop, and reaches the exact temperature you need. If you don’t have a heat press, a convection oven works too, though you have to be careful not to burn the paper. I don’t recommend a regular oven with hot spots, because that will cause uneven heat transfer.
- Cutting Tool: I use a Cricut Explore Air 2, but a Silhouette Cameo works just as well. If you’re doing large bulk orders, you can even use a manual die-cut machine, but a digital cutter will save you so much time when you’re doing custom shapes.
- Teflon Sheet or Parchment Paper: This is non-negotiable. It keeps the heat press or oven from sticking to your sublimation paper, and it protects your equipment from ink stains. I use a Teflon sheet that I’ve had for three years—just make sure it doesn’t have any holes, or you’ll get ink on your press.
Prep Your Design: The Part Most People Skip (And Why It Matters)
Before I even touch the printer, I spend at least 10 minutes tweaking my design, and that’s how I avoid 90% of the mistakes new makers make. Sublimation ink works differently than regular ink: it’s translucent once it transfers, so white areas on your design will actually be the color of the blank sticker material. If you have a white element in your design, it will disappear, or turn a faint gray on most vinyl blanks. That’s why all my designs have a white border or a solid background—if a customer wants a white cat on a black water bottle sticker, I use a black polyester vinyl blank, and the cat is a solid color that stands out.
Another key thing: design size. When you print, you need to mirror your design 100%. I can’t tell you how many times I forgot this in my first month, and ended up with all my text backwards. In my design software (I use Canva for simple designs, and Adobe Illustrator for complex custom orders), I just check the “mirror” option before sending to print. I also make sure the design fits within the printable area of my sublimation paper—no cutting it too close, or you’ll end up with half the image missing when you transfer it.
When it comes to resolution, I always use 300 DPI or higher for all my sticker designs. Sublimation ink transfers very sharp, but if your original design is low resolution, it will look blurry on the finished sticker. I once tested a 150 DPI design for a bulk order of coffee shop stickers, and half the orders came back looking pixelated—now I always double-check DPI before printing.
Printing and Transferring: The Step Where Quality Shines
Now we get to the fun part, but take it slow here—rushing this will ruin your entire batch. First, I set up my sublimation printer correctly. I fill the tanks with sublimation ink, not regular ink, and run a few cleaning cycles to make sure the ink is flowing properly. I also load the sublimation paper into the printer with the matte side facing down—this is the side the ink prints on, and if you load it wrong, the ink will smudge and not transfer.
Next, I adjust the printer settings. On my Epson, I select “Premium Sublimation Paper” as the paper type, and set the quality to “High” or “Best.” If the settings are too low, the ink will be too light, and your stickers will fade faster. I always do a test print on a single sheet of sublimation paper before running a full batch—this lets me check for color accuracy, mirroring, and any smudges from clogged printer heads.
Once I have my printed designs, it’s time to transfer the ink to the sticker blanks. Here’s my exact process, tested over hundreds of batches:
- Preheat my heat press to 380 degrees Fahrenheit (193 Celsius). This is the temperature that works best for polyester vinyl and paper blanks—too hot, and you’ll burn the sticker, too cold, and the ink won’t transfer.
- Lay the sublimation sticker blank flat on the heat press mat, then place the printed design face-down on top of the blank. I make sure there are no air bubbles, or you’ll get gaps in the design.
- Cover the design with a Teflon sheet. This keeps the heat from escaping evenly, and prevents the ink from transferring to the press itself.
- Press for 45 to 60 seconds. I use a medium pressure setting—you don’t need to mash the press down, just enough to create a tight, even seal. If you use too much pressure, you’ll get distorted designs; too little, and the transfer is incomplete.
- Carefully peel back the Teflon sheet and the sublimation paper immediately while both are still hot. I learned this the hard way—letting it cool will cause the ink to stick to the paper, not the sticker blank, and you’ll have a half-finished batch.
Wait for the sticker to cool completely—about two minutes. Once it’s cool, you’ll see the design is now part of the sticker material, no separate ink layer sitting on top. That’s the magic of sublimation; the ink binds to the polyester molecules, so it won’t scratch off, smudge, or fade like regular ink stickers. I once left a batch of my sublimation car stickers on my porch for three months, through rain and direct sunlight, and they looked exactly like the day I made them—way better than the inkjet stickers I sold in my first year, which faded in two weeks.
Cutting and Finishing: The Final Touch for Wholesale
I use a digital cutter to cut my stickers, and I always use the “kiss cut” setting—this cuts through the adhesive layer and the thin vinyl or paper blank, but not the backing sheet. That way, all the stickers stay on the sheet, making it easy to pack and ship, and customers can peel them off without any extra work. For custom die-cut stickers (like a cat shape or a coffee cup), I upload the design to my cutter software, add a 1/8 inch offset so the cut line is slightly outside the design, and hit start.
If I’m doing bulk orders, I’ll cut multiple sheets at once—my Cricut Explore Air 2 cuts a 12×12 inch sheet in about five minutes, so a batch of 100 stickers takes less than an hour. I also add a clear laminate to the back of some vinyl stickers for extra durability, though that’s optional. For most wholesale orders, I use a matte or glossy laminate that adds an extra layer of protection without making the sticker feel thick or bulky.
Once the stickers are cut, I inspect every single one for quality. I look for smudges, incomplete transfers, or crooked cuts—any sticker that doesn’t meet my standards goes in a “sample” pile for my own use, not with customer orders. I also sort them by size and design, then pack them in clear bags with a small backer board to prevent bending during shipping.
Why Sublimation Beat All Other Methods for My Business
When I switched to sublimation, my customer satisfaction rate jumped by 40% in six months. Customers told me their stickers didn’t peel off water bottles, didn’t fade in storefront windows, and looked professional enough to use on product packaging. The biggest win, though, was time: I used to spend 10 hours a week hand-cutting, and now I spend about two hours a week on cutting and finishing. That extra time let me take on more bulk orders, expand my product line to custom branded stickers for small businesses, and lower my prices because my production costs are cut by almost half.
The only limitations I’ve found with sublimation stickers are that you can’t use them on non-polyester surfaces, and you can’t have white designs—since the polyester blank is the color you see. But for 95% of the sticker uses my customers need (water bottles, laptop decals, promotional giveaways, product labels), that’s more than enough.
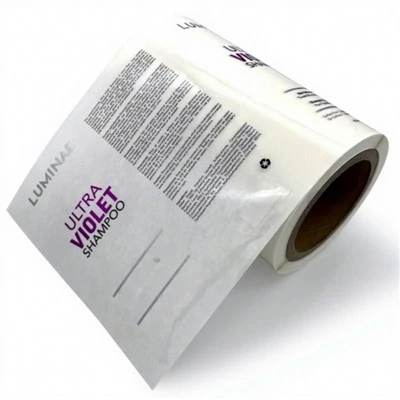
If you’re a small business owner looking to add stickers to your product line, or a starter looking to build a side hustle, sublimation is the way to go. It’s not as complicated as it sounds once you get the basics down, and the quality will set your products apart from every other sticker on the market.
Ready to Work With a Sticker Supplier Who Cares About Quality?
Industrial & Chemical Labels If you need bulk sublimation stickers for your business, brand, or promotional needs, we have the capacity to handle runs as small as 50 stickers or as large as 10,000, all made with the same careful process I outlined above. We offer custom designs, bulk pricing, and fast turnaround times to meet your deadlines. To discuss your specific needs, feel free to reach out to us for a consultation.
References
- Sublimation vs. Traditional Printing: A Guide for Custom Sticker Makers, Sticker Business Hub, 2022
- Epson EcoTank Printers for Sublimation Applications, Epson Technical Support, 2023
- Polyester Sticker Blanks: Best Practices for Sublimation Transfer, Vinyl Craft Monthly, 2021
- Heat Press Temperature and Time Guidelines for Sublimation, SubliGrade Ink Technical Manual, 2022
SpeedPrint Era (Xiamen) Digital Co., Ltd.
SpeedPrint Era (Xiamen) Digital Co., Ltd. is one of the most professional stickers manufacturers and suppliers in China, featured by quality products and low price. Please rest assured to wholesale advanced stickers made in China here and get quotation from our factory. We also accept customized orders.
Address: Floor 1, No. 27, Xianghong Road, Xiang’an District, 361101, Xiamen, Fujian, China
E-mail: hxmacka@gmail.com
WebSite: https://www.lumolabels.com/
